
Why This Guide?
To let attendees view live translations on their devices, you need to prepare and share a QR code for each room.
Each room has one QR code that can be reused throughout the entire event. For example, if your event lasts multiple days in the same room, you only need to share one QR code. If your event has multiple rooms (e.g., Room A and Room B for simultaneous sessions), each room will have its own QR code.
Attendees can scan the QR code in advance (via email or website) or on site (via banners, signs, or screens) to access live translations instantly. You can send it ahead by email/website, and also show it on site via X-banners, POP signs, or projector screens.
Key Terms
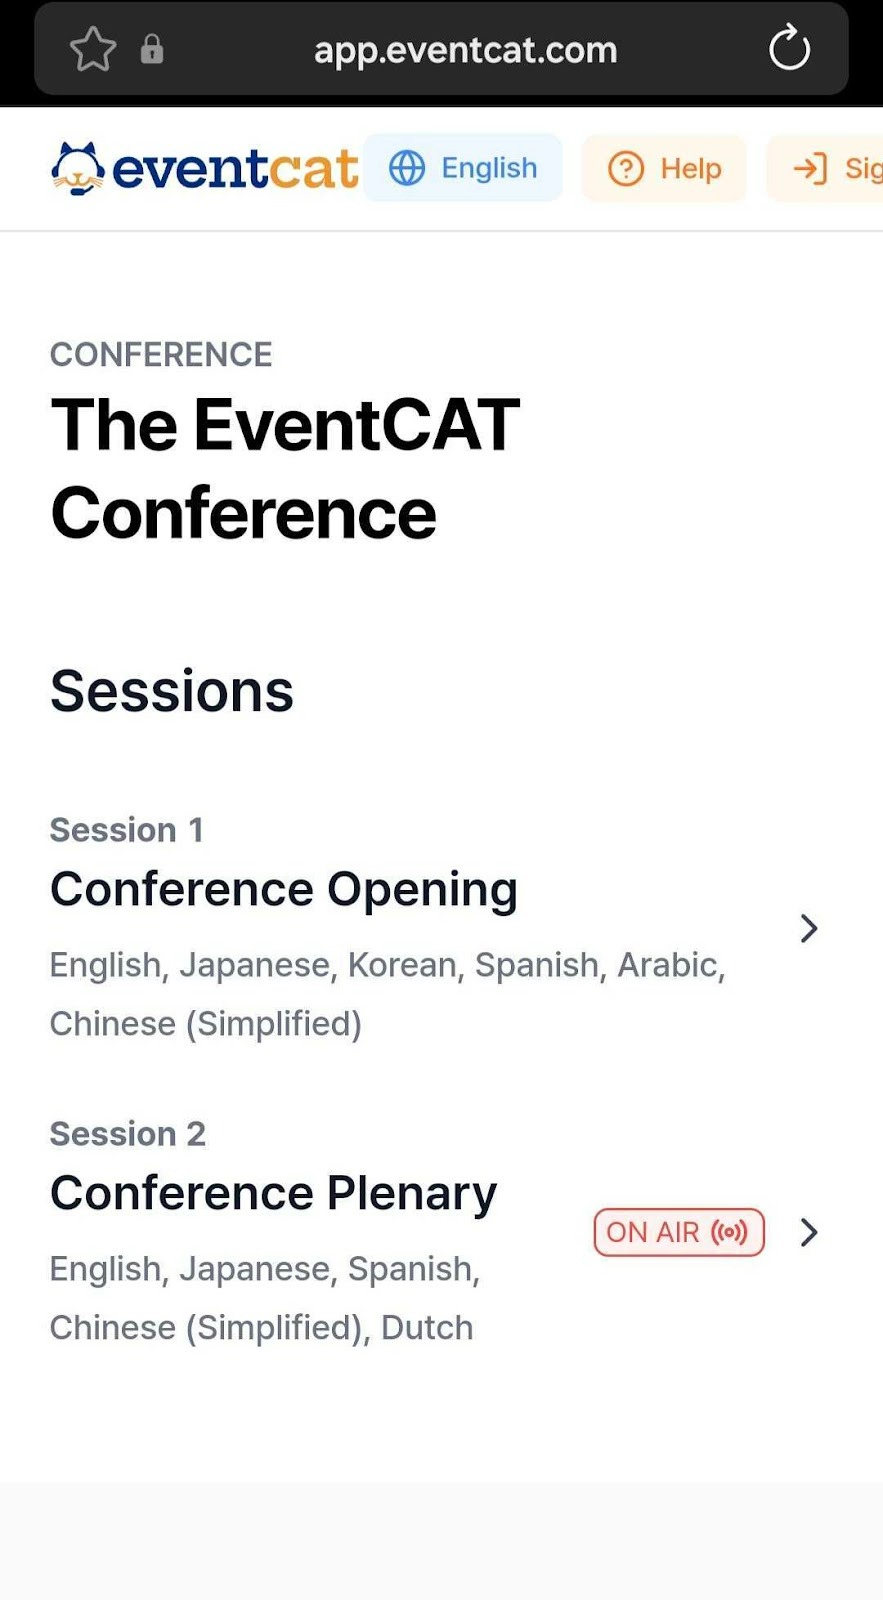
Conference (parent level): Represents a single event. A purchased Pass (Prepaid, Half-Day, or Day) must be assigned to the Conference to enable session creation and live translation.
Room: A room within a Conference (e.g., Room A, Room B). Each room has one QR code that is used throughout the event.
Session (child level): A time block within a room, usually split by agenda (e.g., Opening → Session 1 → Lunch → Session 2). Sessions do not have separate QR codes. When attendees scan the room QR code, they will see the session that is currently On Air and can join with one tap.
This guide covers:
How to create a Conference, Rooms, and Sessions
Where to download the Room QR code
How to share it in advance and on site
Tips for multilingual or academic events
Step 1. Create a Conference and assign a Pass
Purchase a Pass (Prepaid, Half-Day, or Day)
Create a Conference, add a Room
Assign the purchased Pass to the Conference
Step 2. Download the Conference QR Code (Most Common)
In the Conference Dashboard, click Room → Download the QR Code

Link
This exports the main entry QR for the entire conference.
When participants scan it, the current “On Air” session appears. They tap it to open the live translation page—no app required.
Step 3. Download the Room QR Code Directly in Your Session
Go to the Conference Dashboard → Set Up Conference → Checkout → Rehearse & Go Live (Click the Session) → Open Controller

This opens the live translation page for the currently running Session. Participants open live translation instantly—no app required.
How to Use QR Codes for Smooth Event Preparation and Operation, with Real-Life Application Examples
Pre-Event Distribution (Online)
Sending the conference room URL and QR image to registrants and participants via email before the event makes accessing the session much easier.
Including a short URL and QR code on the event homepage or information page increases accessibility.
Sample Instruction Text
Please scan the QR below or visit qrlink.eventcat/ABC.
You can select your desired language after accessing the page.
On-Site Distribution (Offline)
At the event, it's crucial to place QR codes in visible spots so that participants can scan them easily upon arrival.


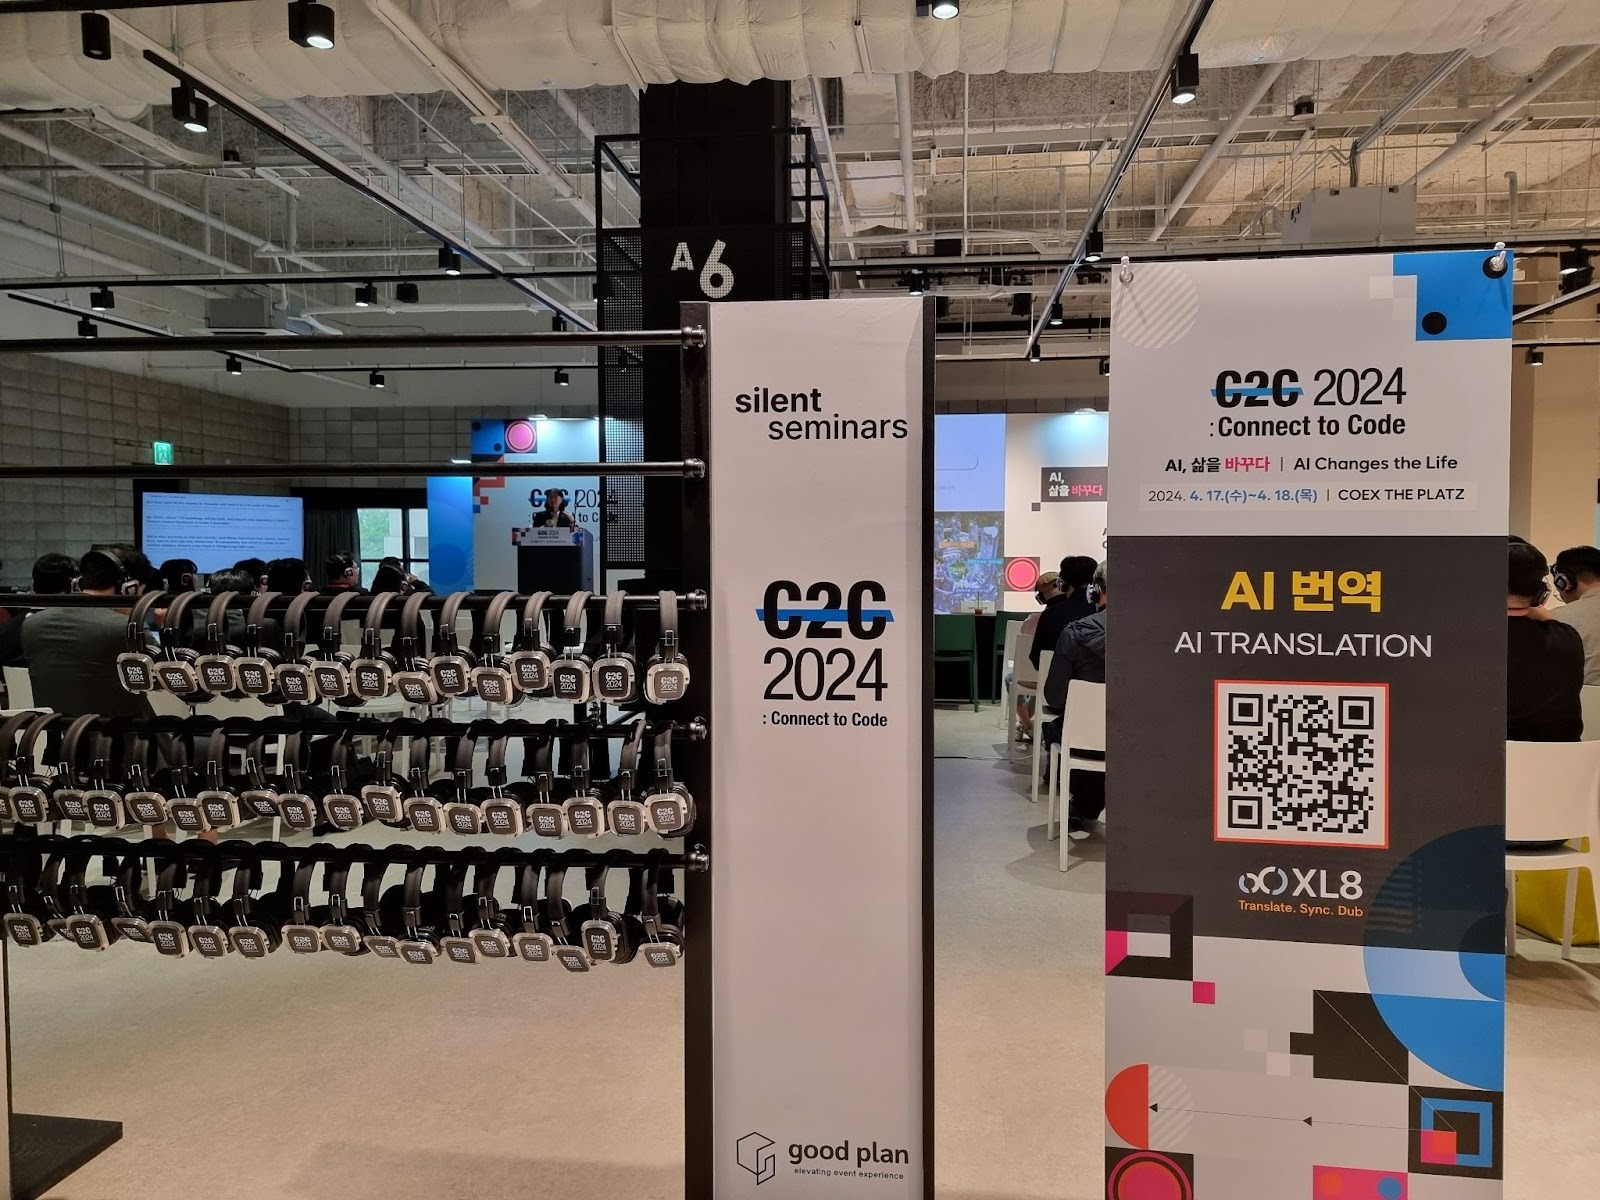

Usage Examples
Screen Waiting Screen: Repeat the display of QR codes and short URLs with language selection instructions before, during, and after the event.
Registration Desk POP or X-banner: Place a QR code in a visible spot as attendees enter, encouraging them to scan while waiting.
Events with Many Tracks: Operate room and session-specific QR codes as needed.
Moderator Announcement Example
If you need real-time translation, please scan the QR on the screen or use the QR on the guide banner to access the translation page.
Proactive Tips
For events with a multinational audience, allowing participants to select their language directly from their devices reduces the operational burden.
For academic conferences, sending the URL and QR to registrants in advance makes it easier for attendees to view the translation screen on their laptops while listening and taking notes.
To simplify operations, using a single conference room QR for the entire event is an efficient approach.
If the glossaries differ by major or detailed topics, dividing sessions and managing session-specific QR codes is more appropriate.
Need More Help?
Visit the EventCAT Help Center
Or email us at contact@eventcat.com
Was this article helpful?
That’s Great!
Thank you for your feedback
Sorry! We couldn't be helpful
Thank you for your feedback
Feedback sent
We appreciate your effort and will try to fix the article