Why This Guide?
Whether you’re hosting a small seminar or a large international event, enabling real-time multilingual interpretation with EventCAT is quick and easy. This step-by-step guide for our Conference V2 will help you set everything up with no technical experience required. In just minutes, you’ll be ready to create a smooth, inclusive experience for participants in any language.
Step 1: Discover our EventCAT Conference V2
Go to eventcat.com and log in.
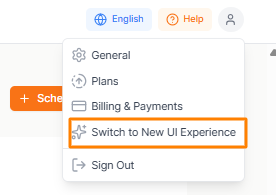
Once you are there, click Conference, then click the icon in the top-right corner and select Switch to New UI Experience.
Step 2: Create a New Conference
Step 2-1: Start New Conference and Add Basic Info
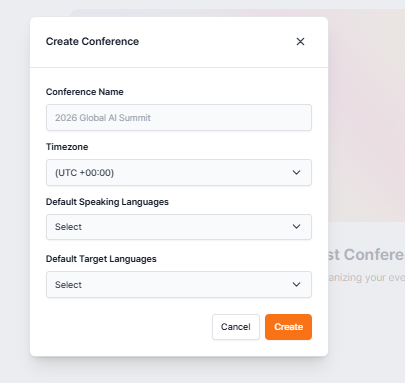
Enter the Conference Name.
Select the appropriate Timezone from the dropdown menu.
Choose the Default Speaking Languages for your event.
Select the Default Target Languages for translation.
Click Create to save and create the conference
Step 2-2: Add Sessions
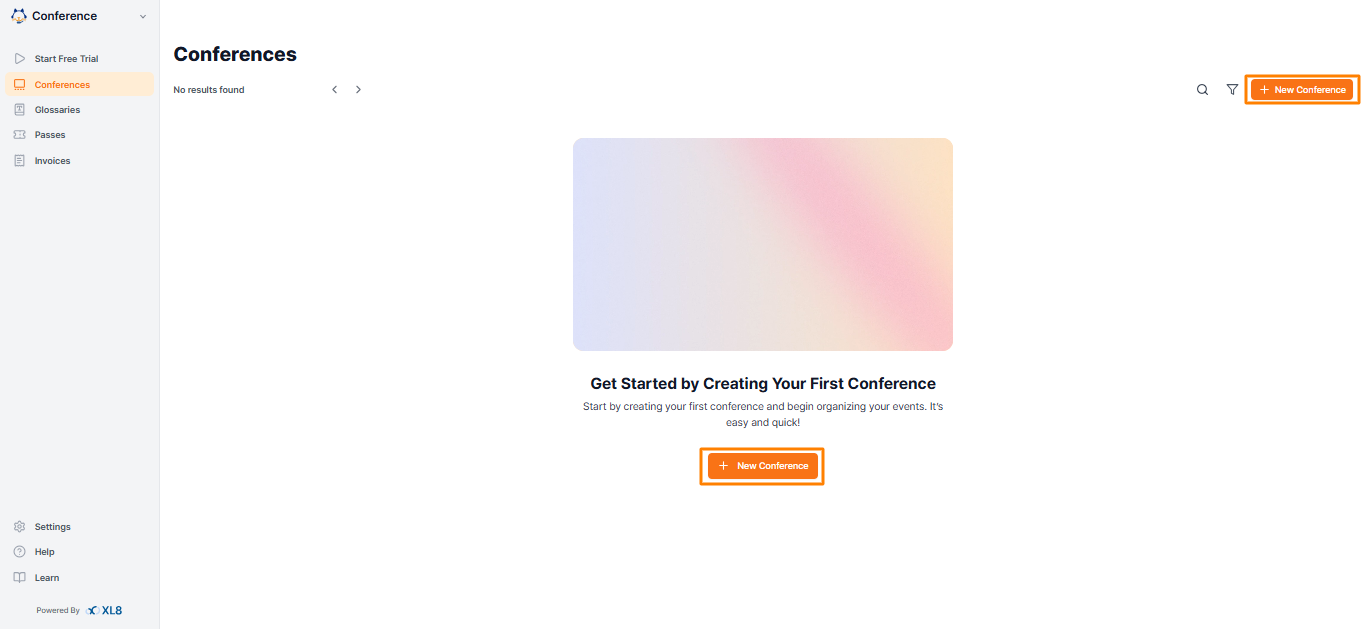
Click Select Date to choose the day(s) when your conference will take place, then click Confirm.
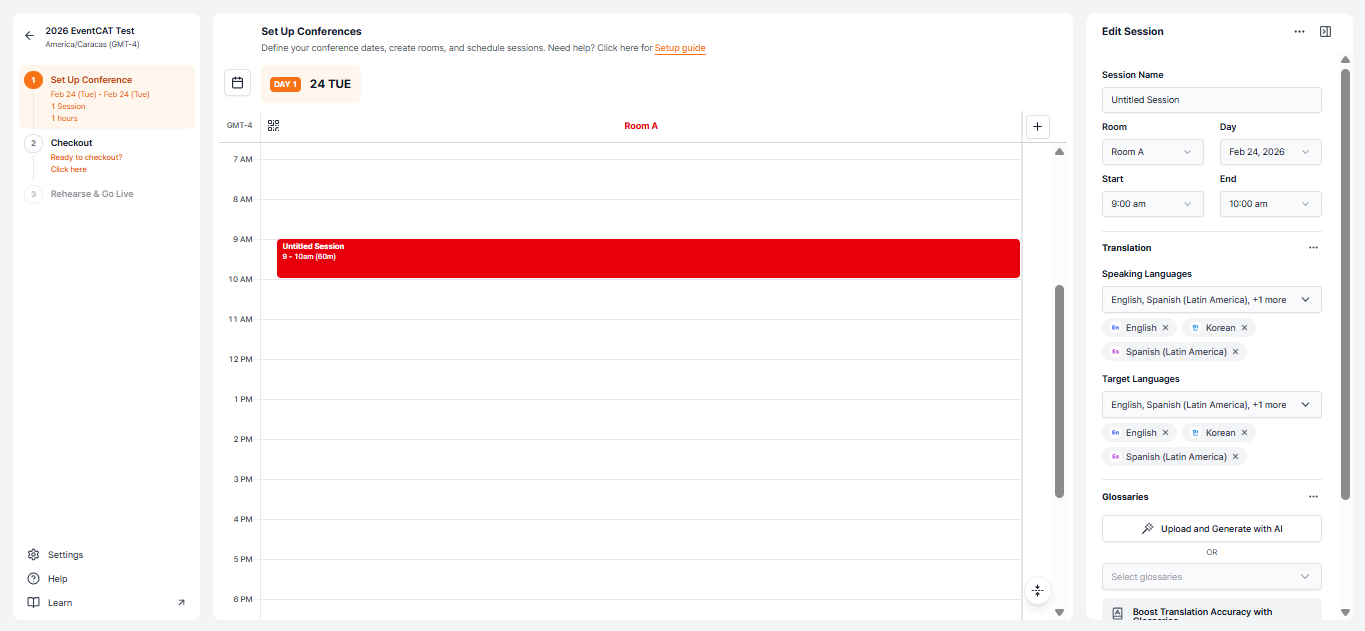
After selecting the date, the system will automatically create Room A and add a default session scheduled from 9:00 AM to 10:00 AM, shown as the red block on the calendar.
You can double-click the red session block to edit its details. This will open the Edit Session panel on the right side (as shown in the second image), where you can:
Edit the Session Name
Adjust the Start and End time
Select Speaking Languages and Target Languages
Add or select Glossaries for translation
Related article: How to Create a Glossary in EventCAT Conference V2
This panel lets you fully customize your session settings before going live.
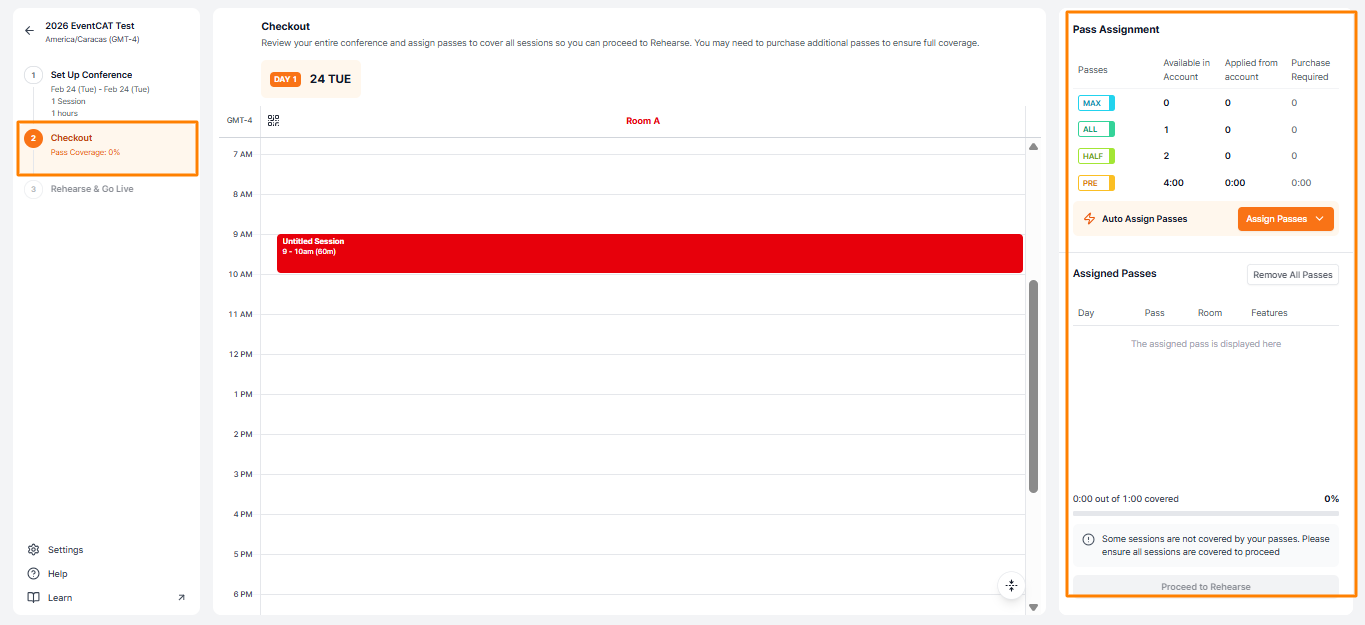
Step 3: Assign Passes
Once you are ready, click Checkout to assign passes to your sessions.
On this page, the Pass Assignment panel on the right lets you manage coverage. Here you can:
See how many passes are available in your account
Assign passes automatically using Auto Assign Passes or assign them manually
Check pass coverage and see if additional passes are required
All sessions must be covered with passes (100% coverage) before you can proceed to rehearsal and go live.
Related article: Conference V2 Quick Checkout Guide – Pass Setup & Coverage
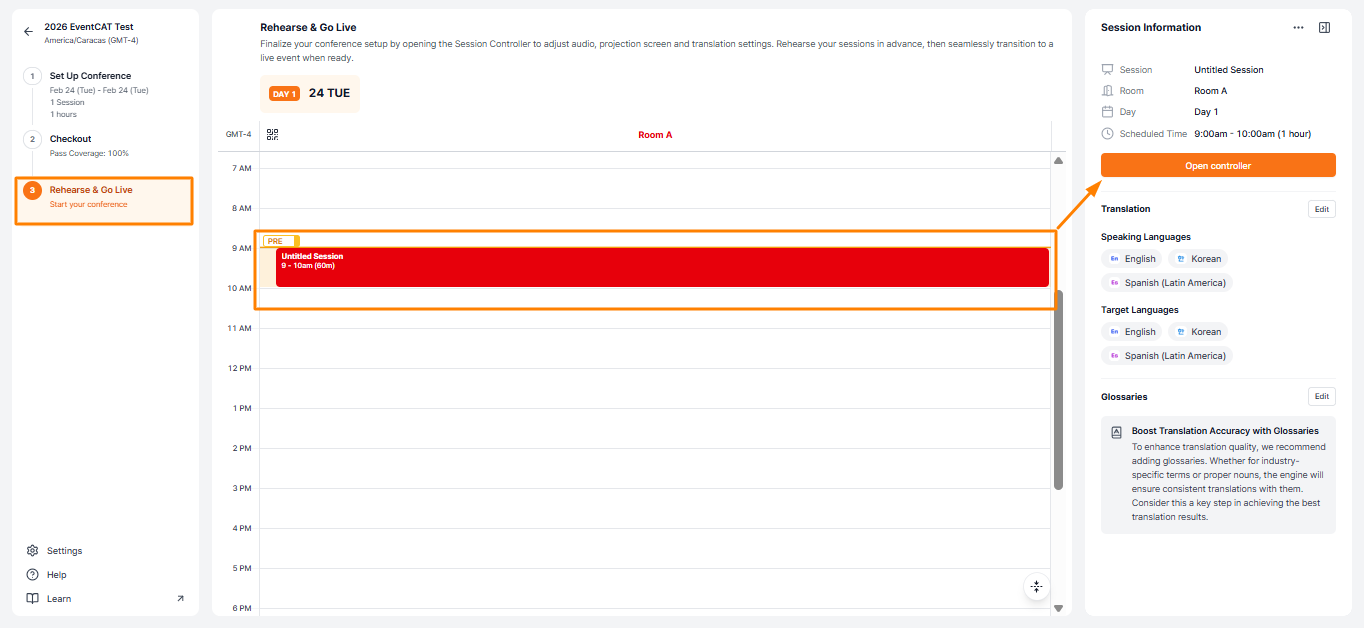
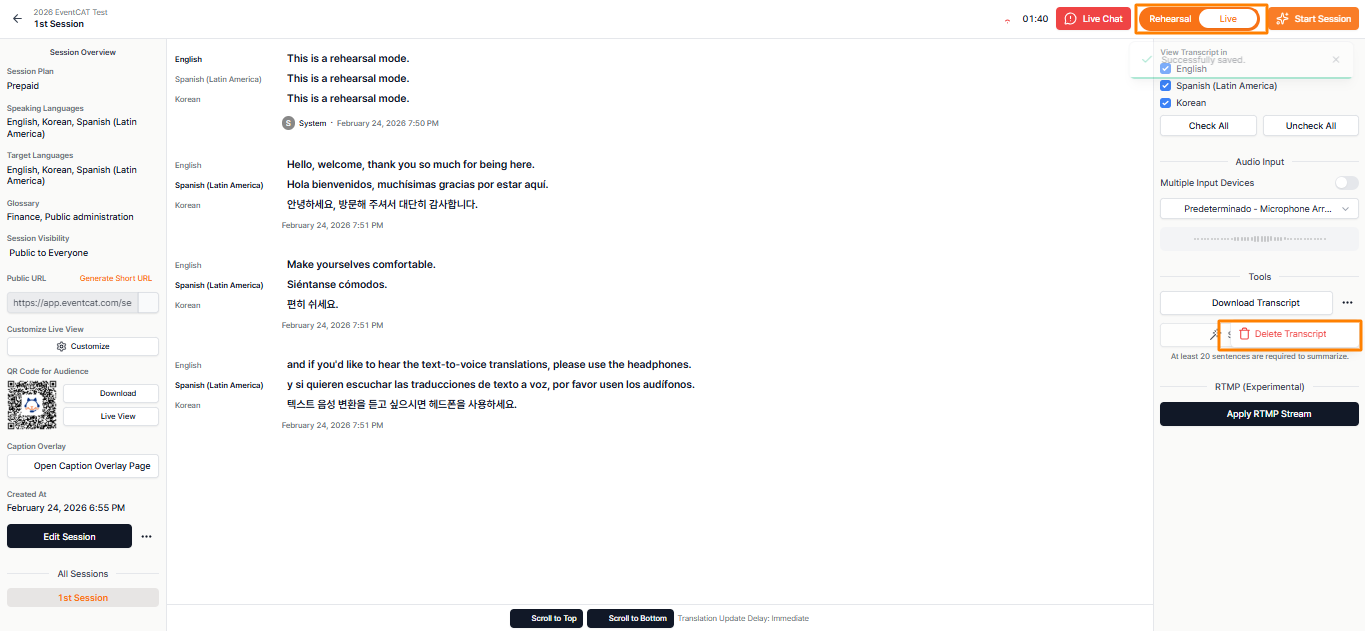
Step 4: Rehearse & Go Live
Once you have 100% pass coverage, click Rehearse & Go Live in the left sidebar, then, click on your session, and finally, click Open Controller to start managing and running your event.
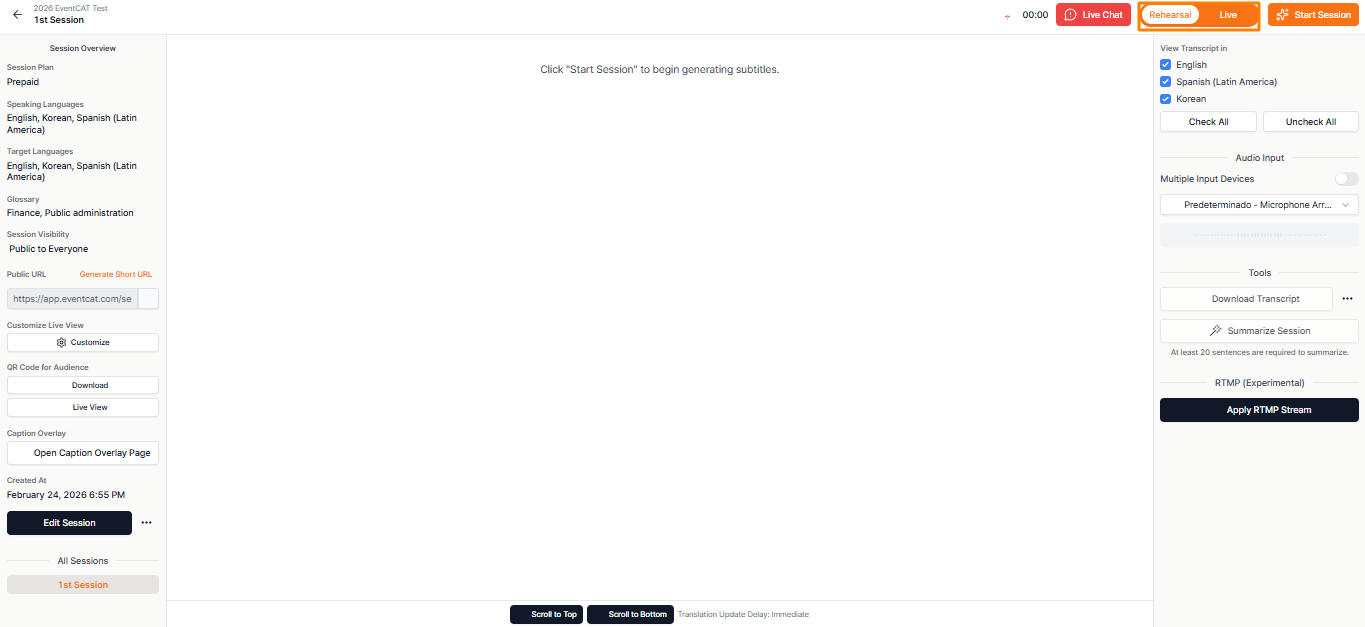
Step 5: Run Your Event from the Controller
On the left, use Live View to monitor and edit your session. On the right, check your audio input settings.
If no external microphone is available, use your computer’s built-in mic. Make sure the laptop is placed close to the presenter to ensure clear audio quality.
Step 6: Try a Rehearsal First
In the top-right, switch to Rehearsal Mode and click Start Session.
You’ll be able to test the full experience without using your pass.
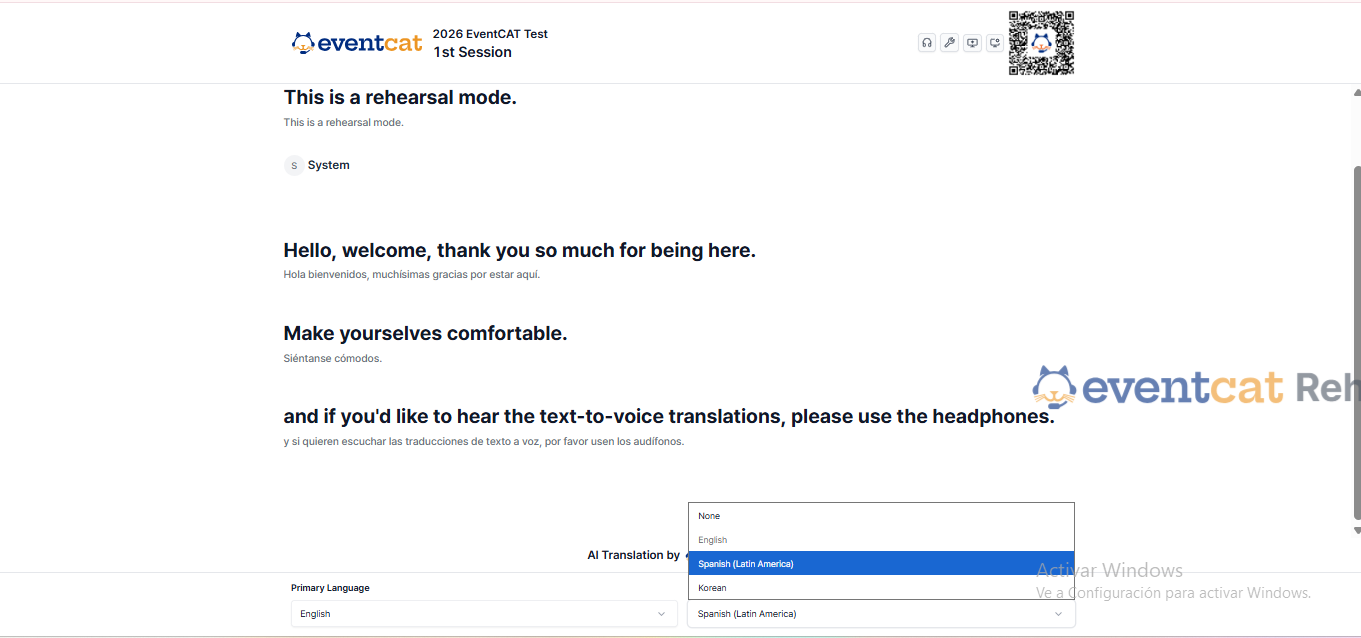
Step 7: Select Languages for Your Audience
Once the session starts and translation begins:
Click Live View to select 1–2 languages for display on the LED screen.
Additional languages can be accessed via QR code by participants on their phones.
Step 8: Customize Your Live View
Use the settings menu (top-right) to adjust font size, background color, or enable presentation mode.
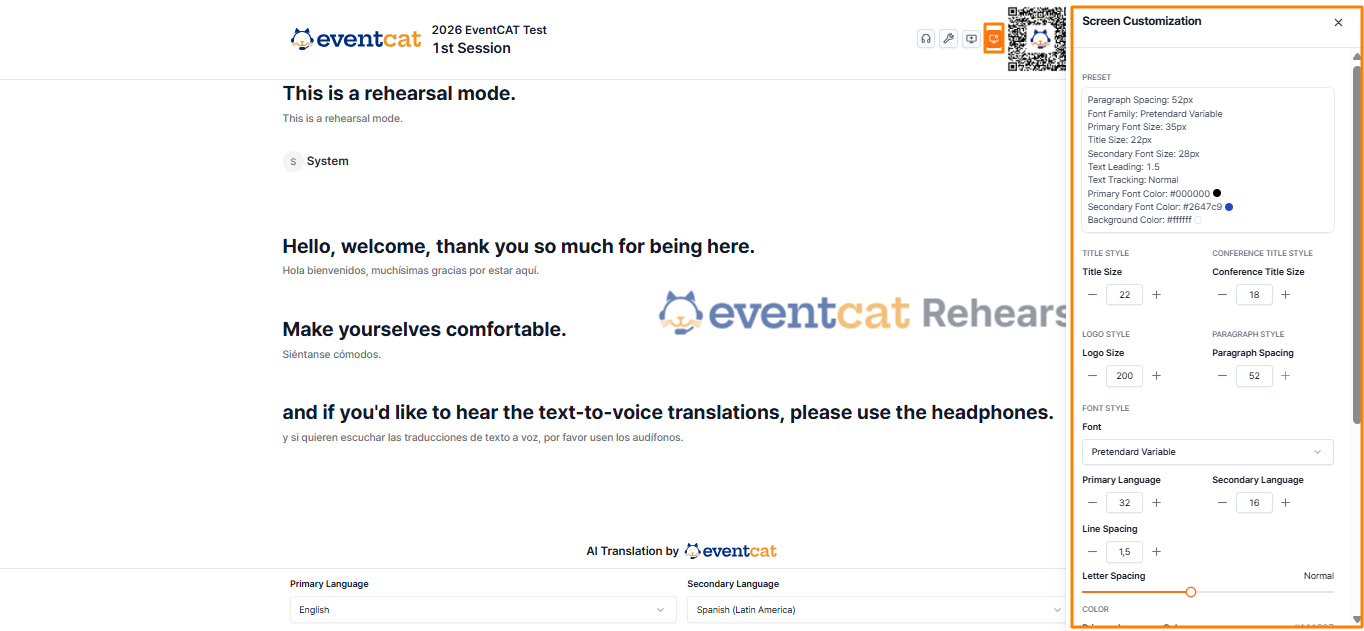
Note: Available only for Half Day Pass, All Day Pass, and All Day MAX Pass.
Step 9: Go Live!
Back in the controller, click Stop Session to end rehearsal.
Delete any rehearsal transcripts.
Switch to Live Mode and click Start Session to kick off your event for real.
Things to Keep in Mind
Use a wired LAN for stable internet — Wi-Fi may cause issues.
Once you start a paid pass, it can’t be reused — always check your mode (Rehearsal vs. Live).
Using a built-in mic? Reduce background noise and place your laptop close to the speaker.
QR codes and URLs differ for each room and session — share wisely.
After the event, download transcripts and summaries in your preferred language.
Related article: EventCAT Conference Onboarding Guide — Translation for international events, seminars, and conferences
If this guide does not resolve the issue, users can reach out for further assistance:
Go to EventCAT Help Desk
Need more help? contact@eventcat.com
Was this article helpful?
That’s Great!
Thank you for your feedback
Sorry! We couldn't be helpful
Thank you for your feedback
Feedback sent
We appreciate your effort and will try to fix the article